 Form Details
Use the Form Details page to modify forms, create and modify rules for processing forms, and link forms to each other.
Modify Form
- On the top menu bar, click System Management (
 ) > Administration > Work Management >
App Designer
 - On the App Summary page, click the form you want to modify
-
On the Form page, at the top middle of the page, choose the part of the form to work on:
Part of App Description  Form
FormAdd and modify sections and add various types of fields to those sections  Links (Optional)
Link the form to other related forms  Rules (Optional)
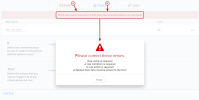
Add and modify if/then rules to automate your workflow Settings Configure the form's settings A red dot means that part of the form contains an error.
 3a:
3a:  Form
Form
 Add Section
- Click + Add Section. Result: A new section appears
- In the new section, fill in the section name
- Add fields. See Add Field, below
 Add Field
- Click + Add Field. Result: The Add Field window appears
- In the Add Field window, click the field to add. For details on fields and how to configure them, see Field Types
- In the Configure Field window, fill in the fields. For details on fields and how to configure them, see Field Types
- Click Save
 Move Sections and Fields
Part of Form How to Move Field - Click Move (
 ) to drag and drop the field into a new location in the section or in another section
 Move Data List Fields to Other Sections
- Click the Data List field type
- In the left column, set Group Fields to N
- Click Save. Result: The form refreshes with the Data List field absent, but the fields it contains now appear with Move (
 ) button
 - Find the Data List field you want to move to another section and click Move (
 ) to drag and drop it into a new location in another section
If you move all fields out of the Data List field and into other sections of the form, then open one of them and change Group Fields to Y, the system puts all the fields back in the original Data List field in the section that originally contained it.
Section - Click Move To (
 ). Result: The Move To dropdown list appears with the other sections in the form
 - In the Move To dropdown list, choose the section to you want to place this section above. If you choose the final section, the moved section appears as the new final section
 Delete Sections and Fields
Part of Form How to Move Field - At the right end of the field, click the ellipses ( ...). Result: A small window appears
- In the window, click Delete (
 )
)
Section - In the upper right corner of the section, click Delete (
 )
)
 Copy Fields
- At the right end of the field, click the ellipses ( ...). Result: A small window appears
- In the window, click Copy (
 )
)
3b:
 Links (Optional): Link the form to other related forms
3c:
 Rules (Optional): Add and modify rules to automate your workflow
3d: Settings: Configure the form's settings
-
Save and other final actions: See Saving and Publishing, below
- In the upper right corner, click Preview
- In the Preview window:
- Check the form for layout, field names, order of fields, etc.
- Validate the form: At the bottom of the Preview window, click Validate. Result: The system highlights invalid values based on the validation options you've put in the fields, i.e. required fields, minimum values, allowable characters, etc.
The actions for saving, canceling, and publishing a form depend on that state of the form:
The ellipses (...) Save buttons have different actions, depending on the stat of the form:
|
State of Form: |
Draft A form in the process of being created, or that has been saved but never published. A draft form is only available to users for testing purposes |
Published A form that has been saved and published, and is available to users |
Revision A form that has been published, but is currently being modified and tested prior to being republished |
| Action ↓ | |||
|
... Ellipses |
Discard Draft:
|
Unpublish Form:
|
Discard Revision:
|
| Cancel |
|
|
|
| Save |
|
|
|
| Save & Publish |
|
|
|

